Tutorial - Creating and Deploying Surveys - Collecting Responses
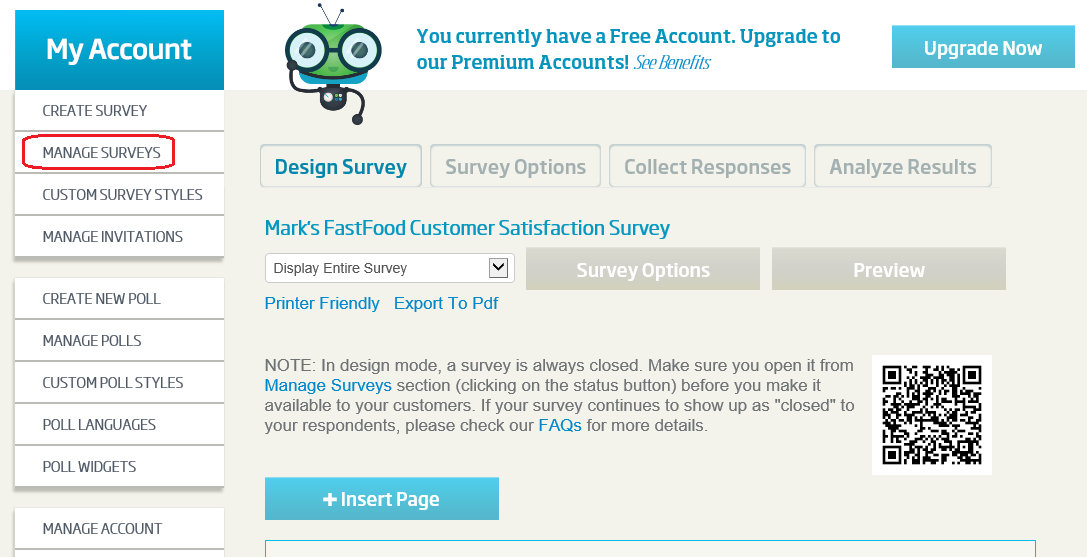
Now that you've created your survey, click on the Manage Surveys button found in the left navigation bar.

You should now be viewing the Survey List page:

This table lets your perform various operations on your surveys including deleting the survey, clearing responses,
reporting on it, setting survey options and collecting responses.
IMPORTANT: Before you can begin to collect survey responses, you must first open your survey. When the survey is closed,
it will not accept new responses (the exception is you as the survey author may click on the preview button or link at any time).
Open the survey now by clicking on the Status link in the row for the survey you just created
"Mark's FastFood Customer Satisfaction Survey". As the survey is currently closed,
the link should say "Closed".
Once you click it, it will change to "Open".
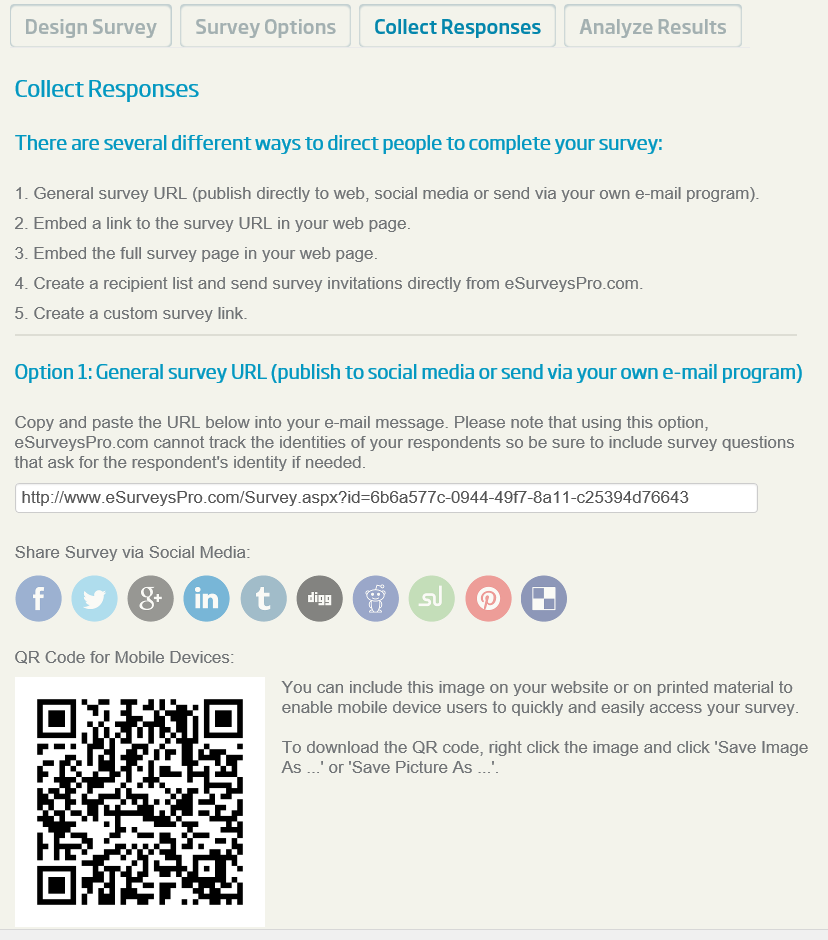
Now, click on the "Deploy" icon. This will take you to the Collect Responses page:

There are several options for collecting responses (deploying survey):
1. A URL is provided that you can simply cut and paste into your own email or publish on any web page.
For your convenience, submit links to the most important social networks and a QR code that will link to the survey is available.
2. Code for an HTML link is provided that you can embed in a web page.
3. HTML code provided so that you can embed the full survey into a web page.
4. You can have eSurveysPro send and track survey email invitations for you.
5. Create a custom survey link. This feature is only available for Premium accounts or above.
For this tutorial, you will use option 1 and simply copy and paste the URL into an email message you create with your email program of choice.
When the email recipient clicks on the URL, they will be directed to the survey. Alternatively, you may simply paste the URL into your web browser if you prefer.
Take a moment now to complete the survey so that you will have at least one response to view in the survey reports which will be covered in the next section of this tutorial.
NOTE: if at any time you get a message telling you that you have already responded to the survey,
that's because we set the response option to allow only a single response per user
(although as the survey author, if you are logged in to your eSurveysPro account, you will be able to respond to the survey more than once).
Once you have completed the survey at least once, click on the Reports icon in the row for your survey in the Manage Surveys page.
Click NEXT to continue with this tutorial.
<< Back
Next >>
